Quantcast
Channel: NI Reaktor Tutorials
Viewing all 150 articles
Browse latest View live

Reaktor 5.9 Review

$
0
0
Reaktor 5.9 has been released, and with it some nice fixes and upgrades to the Reaktor framework.

WHAT’S NEW

There are a several new upgrades that directly impact the building experience in Reaktor. The first, Quickbus highlighting in Core, is quite useful. To me, it’s one of those upgrades that once it’s there, leaves you wondering how such an obvious and simple thing could have been missing for so long.

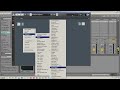
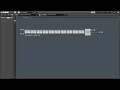
Whenever you select a Quickbus inside a Core structure, every instance of that Quickbus will be highlighted. This is fairly useful, as many Core programmers, myself among them, make liberal use of Quickbuses in order to keep our code looking clean, and avoid “spaghetti code”, where everything is tangled and you can’t tell what goes where.

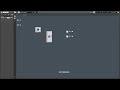
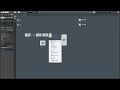
However, using too many Quickbuses could in the past cause a similar problem – without Quickbus highlighting, it was often difficult to tell what was happening in your code. In the following image, you can see an example of the highlighting in action:


The second change that affects the building process is there is no longer a limit to the number of certain types of modules that can be used simultaneously. In previous versions of Reaktor, you could not have more than 200 of certain event modules active in an ensemble. Anything over this limit, and the modules simply did not work. This behaviour was never very well documented and, unsurprisignly, this has led to some utterly strange and very difficult to track bugs.

Every ‘control rate’ module (those modules that output events at the control rate, such as the LFO, the System Info, etc, suffered from this limitation. What was worse, it wasn’t just 200 of any one of these, there could only be 200 control rate modules, total. Clearly, having the limitation removed is a definite improvement to the Reaktor workflow.

Perhaps my favorite change of the bunch is one that I didn’t even know had existed before I sat down to write this article, ‘Default if Missing.’ With such an exciting name, I would not be surprised if many people glossed over it like I did.

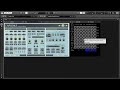
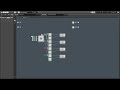
However, the new ‘Default if Missing’ property, which can be found in the FUNCTION tab of the properties of any module that saves snapshot data, is something I have wanted for some time in Reaktor.

There is a somewhat obnoxious element to programming snapshots in previous versions of Reaktor: If you choose to edit your ensemble later on, by adding new parameter controls such as knobs or buttons, those new controls have no snapshot data for the saved snapshots. Therefore, when a snapshot is recalled, instead of changing their value, they would simply stay wherever they happened to be. With the ‘Default if Missing’ property checked, (and it will be on automatically for every new module that saves snapshot data) they will instead recall their default value, also specified in the FUNCTION tab of the module properties.

For example, say I’ve built a synth, and after programming 20 snapshots, I decide I want to add a delay effect to the end of the signal chain. Up until Reaktor 5.8, I would then have to go thru those 20 snapshots and save them again, one by one, with the delay turned off so as to not change the sound of the snaps.

With Reaktor 5.9, we can now simply set the default values of the delay effect to be off, and the previously saved snapshots will continue to load properly without having to re-save them individually by hand.

Another big change is that Reaktor 5.9 adds support for the AAX2 format in Pro Tools 11. This one pretty much speaks for itself – if you use Pro Tools and Reaktor (a strange combination in my opinion, but one that could be quite powerful) together, you’ll clearly want this. I haven’t actually used Pro Tools since before I started programming in Reaktor, so I can’t comment further, unfortunately.

Finally, there is the enigmatic ‘integration with Maschine’ improvements. We won’t know exactly what this means, I don’t think, until Maschine 2.0 is released on November 1st, but we will have more on this topic as information becomes available.

WHAT’S FIXED

Many of the new bugfixes focus around the sampler modules, which were fairly buggy in 5.8. It seems as though they have fixed the bug that caused certain .WAV to simply not load in Reaktor samplers. I’m not sure what the cause of this was, I think it had something to do with files that were recorded at a different sample rate than Reaktor’s current sampling rate.

Another bug that caused Reaktor to crash while loading samples has been fixed, along with changes to the sample map editor (there were many complaints about this, I frankly could never quite understand what the problem was but I am not a huge fan of the sampling system in Reaktor to begin with, so I never used it enough to really notice).
Snapshot morphing via MIDI has been fixed as well, along with many other minor bugfixes.

CONCLUSION

The only downside to this release is that you must have either OS X 10.7 or higher, or Windows 7-8. XP and 10.6.8 are no longer supported, although I have seen one sucecssful report of a user installing on a Win 7 machine and moving the files over to an XP machine.

All in all, this is a very good and stable release, and is recommended to anybody with the operating system to support it!

Have a Question or Comment About This Tutorial?

Want to ask a question about this tutorial or perhaps you have something to add?

Click through to our forum post about this tutorial and join the conversation!

Visit: Reaktor 5.9 Review

The post Reaktor 5.9 Review appeared first on NI Reaktor Tutorials.


7 Hours of Reaktor Tutorials

$
0
0

Here’s a load of Reaktor tutorials for you – basically this all the weekly ‘subscriber only’ content from this site.

Theses tutorials are by the very talented SalamanderAnagram.

There is around 7 hours worth here of Reaktor content – all kinds of stuff in here. Enjoy!

How to build a synth in Reaktor – part 1 (A beginners guide)
http://www.nireaktor.com/reaktor-tutorials/how-to-build-a-synth-in-reaktor-a-beginners-guide/

How to build a synth in Reaktor – part 2 (Adding an LFO and pulse width modulation)
http://www.nireaktor.com/reaktor-tutorials/how-to-build-a-synth-in-reaktor-part-ii/

How to build a synth in Reaktor – part 3 (Event Processing) -
http://www.nireaktor.com/members/how-to-build-a-synth-in-reaktor-part-iii-event-processing/

How to build a synth in Reaktor – part 3 (Tremelo and Glide) – http://www.nireaktor.com/members/how-to-build-a-synth-in-reaktor-part-v-tremolo-and-glide/

How to build a synth in Reaktor – part 4 (Voice handeling)
http://www.nireaktor.com/members/how-to-build-a-synth-in-reaktor-part-iv-voice-handling/

How to build a synth in Reaktor – part 5 (Tremelo and glide)
http://www.nireaktor.com/members/how-to-build-a-synth-in-reaktor-part-iii-event-processing/

Designing a Guitar Synthesizer and a Slide Flute in Reaktor
http://www.nireaktor.com/reaktor-tutorials/designing-a-guitar-synthesizer-and-a-slide-flute-in-reaktor/

Designing a 909 clap in Reaktor
http://www.nireaktor.com/members/designing-a-909-clap-in-reaktor/

Make your own Echo delay in Reaktor
http://www.nireaktor.com/members/how-to-make-a-nice-echo-delay-effect-with-reaktor/

Introduction to FFT for beginners
http://www.nireaktor.com/members/introduction-to-fft-for-beginners/

How to Create Your Own Stutter Glitch Effect in Reaktor
http://www.nireaktor.com/members/how-to-create-your-own-stutter-glitch-effect-in-reaktor/

Working with Phase Modulation in Reaktor
http://www.nireaktor.com/members/working-with-phase-modulation-in-reaktor/

Working with Stacked Macros in Reaktor
http://www.nireaktor.com/members/working-with-stacked-macros-in-reaktor/

Building a simple reaktor modulation network
http://www.nireaktor.com/members/building-a-simple-reaktor-modulation-network/

Making Your Own OTO Biscuit Style Bitcrusher in Reaktor
http://www.nireaktor.com/members/making-your-own-oto-biscuit-style-bitcrusher-in-reaktor/

How to Design Your Own Doppler Effect for Reaktor
http://www.nireaktor.com/reaktor-tutorials/how-to-design-your-own-doppler-effect-for-reaktor/

Make your own vinyl scratch effect with Reaktor
http://www.nireaktor.com/reaktor-tutorials/making-a-custom-vinyl-scratch-effect-with-reaktor/

Making Key and Scale Filtering Macro in Reaktor
http://www.nireaktor.com/members/making-key-and-scale-filtering-macro-in-reaktor/

Building a Chorus Effect in Reaktor
http://www.nireaktor.com/members/building-a-chorus-effect-in-reaktor/

Making a polyphonic unison macro in Reaktor
http://www.nireaktor.com/reaktor-tutorials/making-a-polyphonic-unison-macro-in-reaktor/

Make your own sample masher from scratch
http://www.nireaktor.com/members/building-a-reaktor-sampler-masher-from-scratch/

Build your own arpeggiator with Reaktor
http://www.nireaktor.com/members/creating-a-reaktor-arpeggiator-device-from-the-ground-up/

Making a Step Sequencer with Reaktor Part 1 of 2
http://www.nireaktor.com/members/making-a-step-sequencer-with-reaktor-part-1-of-2/

Making a Step Sequencer with Reaktor Part 2 of 2 – Adding a Glide Module
http://www.nireaktor.com/members/making-a-step-sequencer-with-reaktor-part-2-of-2-adding-a-glide-module/

Constructing a Simple Trill Effect with Reaktor – Part 1
http://www.nireaktor.com/reaktor-tutorials/constructing-a-simple-trill-effect-with-reaktor/

Constructing a Simple Trill Effect with Reaktor – Part 2 (legato)
http://www.nireaktor.com/reaktor-tutorials/constructing-a-simple-trill-effect-with-reaktor-part-2/

Reaktor Based Routing Inside a DAW
http://www.nireaktor.com/members/reaktor-based-routing-inside-a-daw/

12 Reaktor Macros for Unit Conversion
http://www.nireaktor.com/members/12-macros-for-converting-units/

Using the Ducking Features of the MSMAX Ensemble by Twisted Tools
http://www.nireaktor.com/reaktor-tutorials/using-the-ducking-features-of-the-msmax-ensemble-by-twisted-tools/

Understand the Audio Table Module in Reaktor – Part 1 – Audio Looper
http://www.nireaktor.com/reaktor-tutorials/understand-the-audio-table-module-in-reaktor-part-1-audio-looper/

Understand the Audio Table Module in Reaktor – Part 2 – audio looper

http://www.nireaktor.com/members/understand-the-audio-table-module-in-reaktor-part-2-audio-looper/

Reaktor Programming – MIDI Delay Effect
http://www.nireaktor.com/members/reaktor-programming-midi-delay-effect/

How to build a Scrolling Oscilloscope using Reaktor
http://www.nireaktor.com/members/how-to-build-a-scrolling-oscilloscope-using-reaktor/

Using Reaktor’s Send and Receive Modules
http://www.nireaktor.com/members/using-reaktors-send-and-receive-modules/

Making a phrase looper with Reaktor
http://www.nireaktor.com/members/making-a-phrase-looper-with-ni-reaktor/

Creating a Routing Matrix in Reaktor
http://www.nireaktor.com/members/creating-a-routing-matrix-in-reaktor/

Creating an Anti-Aliased Oscillator in Reaktor
http://www.nireaktor.com/members/creating-an-anti-aliased-oscillator-in-reaktor/

Building a Formant Filter in Reaktor
http://www.nireaktor.com/members/building-a-formant-filter-in-reaktor/

Creating Glitch EFX in Reaktor – part 1
http://www.nireaktor.com/members/glitch-efx-reaktor/

Creating Glitch FX, Part II
http://www.nireaktor.com/reaktor-tutorials/creating-glitch-fx-part-ii/

How to timestretch and pitchshift in Reaktor
http://www.nireaktor.com/members/how-to-timestretch-and-pitchshift-in-reaktor/

How to Create a Supersaw style Oscillator in Reaktor
http://www.nireaktor.com/members/how-to-create-a-supersaw-style-oscillator-in-reaktor/

How to create a limiter in reaktor
http://www.nireaktor.com/members/how-to-create-a-limiter-in-reaktor/

How to create a flanger in Reaktor
http://www.nireaktor.com/members/how-to-create-a-flanger-in-reaktor/

The post 7 Hours of Reaktor Tutorials appeared first on NI Reaktor Tutorials.

Using Reaktor as an FX insert in a DAW

Implementing Math in Reaktor

$
0
0

Writing high-quality DSP code almost always requires a substantial amount of math. This leads many people to become frustrated – it’s hard to learn much of anything in the field without having long, confusing equations and terminology thrown at you.

If you are anything like me, you have a tendency to simply skip over any equations you see in a text. However, in DSP this will get you nowhere – in fact the math equations are often the most simple part of DSP papers to understand because they are not burdened by overcomplex terminology. In this tutorial, I’ll explain how I implement math in Reaktor, and how to look at equations with an eye towards understanding them.

DON’T BE INTIMIDATED!

I get a lot of questions about how I am capable of implementing this or that math function so easily. The simple answer of course, is that it only looks easy once it’s done and I understand it! However, I have a lot more to say on the subject.

Most of the math you encounter in early DSP is not any more complicated than what many people do in high school. Personally I dropped out of college after a year and half. I took a few somewhat advanced math classes in college, but that was 11 years ago now, and I took about 8 years off from doing math all together.

When I got into programming in Reaktor, I had to re-learn math that I knew when I was 16! I still have to look up concepts that I understood perfectly well in high school. Math is like that if you’re not always using it.

The number one rule in my book is not to be intimidated by anything! The first time I read Vadim Zavalishin’s tutorials on Zero Delay Feedback Filters, the very first sentence was gibberish to me, and it only went downhill from there. As you can read in this forum thread, I vowed to figure it out even if it took ’6 months’. It took longer than that!

I spent months reading papers about all types of filters, slowly learning the terminology, and piecing together small parts of knowledge from forum posts and Wikipedia articles.

To do something like this, you need some skills, of course. Without some level of mathematical instruction in my life, this task would have been much harder. However, in my opinion, the most important component is to believe in yourself. There is no surer way to fail at something than to tell yourself you are incapable of doing it.

This means, the next time you see a huge equation with a ton of variables and confusing mathematical notation you don’t understand, don’t just tell yourself “Oh I can’t do that.” Instead, buckle down and try to figure it out! If you have to start at the bottom, like I did with filter design, this may require a lot of work on your part.

Of course, you should probably start with something small, that seems in the realm of possibility. Succeeding will bring you more confidence, more knowledge to build on, and more drive to learn and discover.

THE TWO THINGS YOU NEED TO KNOW

The nice thing about programming math is that you often don’t really need to actually *do* math – you just tell the computer to do it for you! Generally speaking, I like to think of math as two things that I need to know – the first is the order of operations, the second is notation. That’s it!

The order of operations is something that is (or should be, at least) taught to all math students in junior high. Simply put, it is a method of doing calculations in a particular order. While the concept is very simple, it can be complicated the by poor mnemonic devices used to teach children.

I understand there are some variations, but here in the United States, we use the phrase “Please Excuse My Dear Aunt Sally” (PEMDAS), which stands for Parantheses, Exponents, Multipy, Divide, Add, Subtract.  Many people assume that therefore, addition happens before subtraction. It doesn’t. The real order of operation is:

1. Parantheses
2. Exponents
3. Multiplication and Division
4. Addition and Subtraction

A common error that many people will make (thinking addition comes before subtraction) is with something like the following question:

5-2+3 = ?

Sometimes, people will interpret this as:

5-(2+3) = 0

In reality, the answer is

5-2+3 = 6,

because 5-2 is 3 and 3+3 is 6. That is, addition and subtraction happen at the same time, from left to right.

Something more complex, like

5-2+3*6

will often get confused as well, by people who ignore the order of operations entirely, as meaning,

(5-2+3) * 6 = 36

These people are simply calculating all operators from left to right, another common mistake to avoid.

This should be interpreted as:

5-2+(3*6) = 21

since multiplication happens before addition and subtraction.

I hope this gives you a fair idea of how the order of operations works. If you ever want to check, WolframAlpha.com [LIIINKK] is a fantastic source for figuring this stuff out. Let’s say, for example, you had the equation

X – Y + Z

and you were unsure whether the addition or subtraction should happen first. You could choose arbitrary values for X, Y, and Z, and punch them into the search menu, and get a result something like this.

It then becomes very clear what the order is.

Once you understand which calculations need to be done first, you simply arrange your modules in that order. For example,

x-y+z*n,

the multiplication happens first, then you do the addition/subtraction from left to right. In Reaktor, you get:

Whereas, for the sake of comparison, the wrong way to do it the I discussed above (simply doing all equations from left to right) would look like this:

Okay, the second thing you need to know is notation. Unfortunately, this one is much more complicated, but only if you let it destroy your confidence will it prevent you from implementing an equation.

What I mean by notation is, simply looking at an equation and at least having an idea of what the symbols in that equation mean. This includes a few things.

First of all, variables. For example, if you see the term fs (where the s is really small, in subtext), you can be almost certain that this means the sampling rate, in Hertz (IE, 44100 or whatever your sampling frequency is). Likewise, an uppercase ‘T’ often refers to 1/fs.

I couldn’t possibly cover all of these – it would be disingenuous of me to pretend like I have a good grasp on them myself. Don’t despair, however, they will almost always be defined in the text.
The other part of notation is mathematical symbols. I’ll give an example of one that stopped me a few times when I got back into Reaktor. Now I don’t understand why I had such a block around it.

Okay, the Σ is a greek letter named sigma. When I first started encountering this a few years ago, I had the annoying realization that I had once known what this meant and understood it well, but I had no recollection of what it did anymore. For a long time I simply ignored anything that used it. Finally at some point, I decided to learn what Σ does, and it’s not that hard.
Simply put, the i = 0 at the bottom means that i starts at 0, and the 100 at the top means it ends at 100. Then, you calculate everything to the right of the Σ symbol, in this case you get the numbers

0, 0.5, 0.666, 0.75, 0.8, etc…

Then, you simply take all of the numbers aquired and add them together! That’s what Σ does, it sums an interated function. Let’s (finally) take a look at how you could solve the same sigma summation in Reaktor:


It’s not so hard!

Again, it’s impossible for me to cover all of mathematical notation (not that I even know it!), but the point is, this stuff isn’t that hard, you can figure it out. If there is a symbol you don’t recognize in an equation, it is almost certain to be a letter in the Greek alphabet, just look it up!

Okay, that’s all I have time for today. Hope this illuminated some basic math for people and if there is interest, next week we can get a little more in-depth.

The post Implementing Math in Reaktor appeared first on NI Reaktor Tutorials.

Generative Sequences in Reaktor

$
0
0

Learn how to create generative sequences in Reaktor. This tutorial is based upon an instrument I made a few years ago in Reaktor, Automato, which can be downloaded here.

The instrument is based upon a web-based project, Otomata, although it is slightly different in certain regards. The original Otomata can be found here.

For more Reaktor tutorials, please subscribe to our Youtube channel.

Click here to view the video on YouTube.

The post Generative Sequences in Reaktor appeared first on NI Reaktor Tutorials.

How to Integrate Reaktor and Maschine 2.0

Understanding and Using the FFT in Reaktor

$
0
0

In this tutorial, I’ll explain what the FFT (Fast Fourier Transform) is, and how to use it properly in Reaktor. We’ll finish up by designing a simple novel filter with a fully adjustable spectrum.

WHAT IS THE FFT?

The FFT is a mathematical process that transforms a signal into it’s spectral components. In our case, this means an audio signal but there are other uses as well. You may have heard it said that any periodic signal can be made by adding together sine waves – see, for example, our series on Additive Synthesis.

What the FFT does, then is take a sound, and return to the user information about the sine waves that make up that sound. Those sine waves can be manipulated however the programmer likes, then sent through an inverse FFT (iFFT) to get back the original signal. If none of the data is changed between the FFT and the iFFT, the output will be identical to the input, just delayed (since both the FFT and iFFT add latency to a signal).

The math to implement the FFT is not actually as tough as many people make it out to be, but the algorithm is tedious to program in Reaktor due to the precense of many iterative processes. Fortunately, we can save ourselves the trouble, as there are already two packages out there for using FFT in Reaktor. The first is FFT Macros by Robin Davies, and the second is EzFFT by Gabriel Mulzer. For the purpose of this tutorial, I’ll be using the EzFFT package.

HOW DOES IT WORK?

To work properly, the FFT takes a number of samples from an audio signal – a 256 point FFT will require 256 data points from the signal (the number of samples will always be a power of 2 – 256 equals 2 to the 8th power).

What gets returned for the user is a stream of complex numbers  called bins. In EzFFT, the number of bins you get back is a part of the name of each FFT macro (IE, EzFFT 256 returns 256 bins, with an index from 0 to 255 – these are output in incrementing order). It’s interesting to note that these are actually 512 point FFTs, as I’ll explain below.

The bins returned by FFT are spread evenly across the frequency spectrum, from 0Hz up to the sampling frequency (44.1KHz by default in most applications). However, a digital audio signal can only accurately depict a signal up to half of it’s sampling frequency, called the Nyquist Limit. This means the second half of the bins returned actually ends up mirroring the first half, containing no information that the user does not already have.

Robin Davies’ FFT package outputs these redundant values, EzFFT does not, which is why I prefer EzFFT.

USING THE DATA

Okay, so we have a stream of complex numbers coming at us:

Here, Idx is the index, or bin number, and the ‘r’ and ‘i’ outputs stand for the Real, and Imaginary components of the complex number.

In case the concept of imaginary or complex numbers are doing your head in, don’t worry, we rarely need to actually use them. Instead, we can translate them using the Vec2Pol macro (part of the FFT package):


This converts from vector (cartesian) coordinates to polar coordinates. The polar coordinates leave us with two values, amplitude and phase, that describe the component sine waves of our original audio signal.

Now, we can use any means we want to manipulate the sine wave data, then we take that data and convert it back to a complex number, and run it thru the iFFT to convert back to an audio stream.

MAKING A SIMPLE FILTER

FFT can be used for a variety of tasks from convolution reverb, to vocoding and more. The easiest thing however, is to create a filter. There are very simple examples available in the EzFFT package, so let’s get a little (but not much) more complicated.

The first thing I’m going to do is make an Audio Table that can hold 256 values. The values range from -96 to 0 and represent the decibels to reduce the amplitude by for each FFT bin. When you set the Table to draw mode (by right-clicking on the Table in Panel view and selecting the Table Draw Mode option), you can draw in a frequency response for the filter using your mouse.

When we receive a new bin Idx from our FFT, we can read out that index from the Audio Table, and use the data there to shape the amplitude of the FFT bins:

Next, all we need to do is translate back to an audio signal using the iFFT:

And done! Note that FFT can cause distortion of lower frequency elements. The more bins you use, the less chance there is of this problem.

CONCLUSION

I know that FFT can be an intimidating subject, often surrounded by an unnecessary amount of jargon, like the rest of DSP. Hopefully this tutorial makes it seem a little bit easier to understand. If there is interest in more material on the FFT, please let me know, there’s a lot to cover!

The post Understanding and Using the FFT in Reaktor appeared first on NI Reaktor Tutorials.

How to Create and Use Custom Knobs for Reaktor


How to Create Reverb in Reaktor, Part I

$
0
0

In this tutorial series, I’ll explain how reverb works and start to create a reverb macro in Reaktor. Many of the basic, freely available reverb algorithms require the creation of custom filter types, and as such, readers of this series are expected to be familiar with at least the first few tutorials in our series on filter design in Reaktor.

I will warn you in advance that designing and implementing high-quality reverb algorithms is not easy. The algorithms we will be starting with are old, and have several flaws. Nonetheless, I think it is an important starting point for learning, if you are interested in designing custom reverbs.

WHAT IS REVERB?

Let’s first get a simple understanding of the real-world effect we are trying to mimic. Reverb is easiest to hear and understand in the context of enclosed spaces. Imagine you snap your fingers from the center of a small room. Sound waves emanating from your fingers will travel in all directions until they hit a wall or another barrier.

When a sound wave reflects off of a surface, some of it’s energy is absorbed, depending on the type of material the surface is made of. Soft materials aborb more of a signal than harder materials, and more of the high frequencies in particular.

The first few milliseconds after a sound is made, very few, if any, echoes are arriving at the ears of the listener. This time period is often implemented in reverbs as a “Pre-delay” knob. How long the echoes take, and their density (the frequency of their arrival) is dictated by the position of the sound source, the position of the listener, and the size and shape of the room.

It is tempting to simply calculate the time it would take for individual echoes to reach the ears of the listener, implement delay lines for each, and simply add all of the echoes together. This technique is called raytracing, and it is also an early 3D graphics technology, I believe it was used in the original Wolfenstein.

However, in practice, this is far more expensive for audio than it it is for visual data, and it is not really worth the amount of CPU this method would require.

SCHROEDER REVERBS

The earliest attempts at creating artificial reverb that I know of were made by Manfred Schroeder, almost 50 years ago. A fantastic resource on these can be found here, by Julius O. Smith. I’ll be working off of this page for the remainder of this tutorial.

Let’s take a look at implementing the three components that make up this graph (the All Pass filters, the Feedback Comb Filters (FBFCs), and the Mixing Matrix. Let’s start with the All Pass filter. Smith provides the following image:

Here, M1, M2 and M3 are delay times, in samples, and ‘g’ is generally considered to 0.7. Notice that this picture really is a single struture repeated three times. Let’s simply implement one of these and copy it three times.

This is not so hard to implement. I used a System Info module to help translate the ‘M’ input (which is in samples) to milliseconds, which the Single Delay module takes as an input.

If I understand correctly, this all pass filter functions as a sort of frequency-dependant delay.

Looking at the transfer function of the Feedback Comb Filters, we can see that they are essentially the same structure as the all pass filter, with the feedforward section removed. This is a simple edit:

The only thing left to implement is the mixing matrix. The All Pass filers and the FBFCs can be wired up like so to match the diagram from Smith’s page:

And finally, adding in the mixer, which Smith notes can be reduced to 4 adds and 2 negations:

I’m not sure exactly why the structure has four outputs, but I tried a few combinations of choosing two of the four to be the left and right outputs. Some work better than others – using a negative version of a signal as one output and the positive version as the other seems to be the worst combination. I have also found that the input or output should be attenuated to eliminate bad distortion. It is also possible I’ve made an error somewhere causing this problem.

CONCLUSION

Today we covered a very basic reverb unit. It lacks many things, most of all, any form of tweakability for the user – there are no knobs! Nonetheless, the basic idea of reverb has been stated and a simple implementation shown. In the coming tutorials, I’ll find some more advanced algorithms to implement.

The post How to Create Reverb in Reaktor, Part I appeared first on NI Reaktor Tutorials.

How to Add a Dry/Wet Knob to a Reaktor Effect

Emulating the NES in Reaktor, Part I

$
0
0

In this series, I hope to build a decent audio emulation of the Nintendo Entertainment System. I get a fair number of questions about emulating various pieces of old hardware, and the NES seems as good an example to use as any – it has a fairly recognizable sound, is well documented, and decent MIDI files are available for most of the popular games for easy testing. The fact that it was my first gaming system as a child also makes me a little biased.

This tutorial is for users who are familiar with Core. We have some introductory tutorials on Core here.

In order to emulate an older machine such as the NES, first, you must make sure there is good documentation available – old systems often used a variety of strange methods and tricks due to the limitations of hardware at the time. Fortunately, the NES has a massive cult following among gamers – in fact, there are people still producing new cartridges for it!

As such, there is an almost overwhelming amount of knowledge available about the 2A03, the chip used to create audio in the NES. For the purposes of this tutorial, I’ll be using the NESdev wiki, specifically the Audio Processing Unit (APU) Page.

RETAINING ACCURACY

When creating an emulator, the choice is yours with how accurate to be – there are often frustrating limitations with the original hardware that can easily be overcome with the processing power of newer systems.

For instance, the old Atari 2600 is notorious for having terrible tuning – the developers of the hardware being seemingly disinterested from the audio aspects of the system. It would be easy to fix this problem in an emulation, however, keeping this poor tuning can, in my opinion, help to retain the character of the system when emulated.

There are other times, such as with the pulse wave generators on the NES, where making an exact replica of the sound wave is far more work than simply using a Primary Pulse Oscillator module, yet gives little improvement over sound or quality.

Nonetheless, the point of this tutorial is mostly an academic exercise on doing our best to emulate a system, as precisely as possible. To that end, I’ll do my best in this series to implement an exact copy of the internal workings of the NES.

CREATING A CLOCK

The first problem we encounter emulating the NES is the CPU clock. This clock has a speed of 1.78977267 MHz – that’s over 40 times faster than the default system clock of 44.1 KHz in Reaktor!

This in itself can be a real problem – we certainly would rather not iterate through a function 40 times every sample clock. Let’s set aside this problem for now and focus on calculating at each sample tick in Reaktor, how many NES CPU clock ticks have happened since we last checked.

Here’s a structure to achieve this goal:

This is not so tough. We calculate the number of NES sample ticks for each Reaktor clock – using a sample rate of 44.1KHz, this ends up being around 40.5844.  We also have a stored value that stores any fractional clock ticks – since the NES clock speed and the Reaktor clock speed are not evenly divisible, there is an extra little bit of time at each sample tick equal to 0.5844 ticks of the NES clock.

After adding together the new NES clocks to anything left over from last time, we use a Mod1 macro (which I’ll show below) to strip out the decimal values, sending the integer to the output to be processed, and storing the decimal to use for next time.

Here’s the Mod1 macro:

This is a simple method to separate the integer component from the decimal component of any number. For instance, if the input is 6.7, we want to send a 6 to the top input and a 0.7 to the bottom. This macro only works for positive values, but since there is never a time when the value will not be positive in this particular instance, this is fine – just a warning to anybody who wishes to reuse this macro for something else.

The Int macro is simply a macro to round to the nearest number:

It doesn’t get much simpler than that!

Okay, so our clock macro outputs two values – the first is a constant, the NES CPU clock speed, which we will use later on with our oscillators; the second is a number of NES CPU clocks to process, and a new value (either 40 or 41) arrives at each sample tick.

CONCLUSION

Next week, I’ll focus entirely upon creating the oscillators. I’ll show how we can often process dozens of NES clock ticks simultaneously, and the basics of creating NES oscillators. I hope you have enjoyed this tutorial, as always, feel free to leave any questions or suggestions in the comments.

The post Emulating the NES in Reaktor, Part I appeared first on NI Reaktor Tutorials.

How to Control Knobs with Reaktor via MIDI

$
0
0

In this video, I show how to use Reaktor to control knobs in external programs via MIDI. This technique is useful in creating automation in any program that accepts MIDI CC control of it’s parameters.

For more videos like this one, please subscribe to our Youtube channel. As always, feel free to contact us with any ideas for future tutorials. Thanks for watching!

Click here to view the video on YouTube.

The post How to Control Knobs with Reaktor via MIDI appeared first on NI Reaktor Tutorials.

Building an NES Emulator in Reaktor, Part II

$
0
0

In this tutorial, I’ll continue the work from last week, building an NES emulator in Reaktor from scratch (well, the audio parts anyway!). In the previous tutorial, I explained many of the difficulties around the emulation process, and designed a simple device to calculate the number of NES clock cycles to process for each tick of the sample clock in Reaktor.

THE APU CLOCK

In my work last week, I forgot that there are actually a couple different clocks used for the oscillators in the NES. The triangle oscillator uses the CPU Clock which we made last week, the pulse and noise oscillators use the APU clock, which runs at half the speed of the CPU clock. It is easy enough to add this:

Now we are ready to get on with making the oscillators, beginning with some common elements.

CREATING A TIMER

A timer, or divider, is a component used by all of the sound generators in the NES. It has a fairly simple operation: it outputs a single clock event for every T+1 events received. The value, T, is given by a simple equation:

T = CPU/(16*F) – 1

Where CPU is the clock speed in Hz, and F is the frequency of the oscillator. In Reaktor, this looks like so:

You may have noticed that T is an integer. This leads to a rounding error in regards to frequency, usually small enough to pass unnoticed.

With a T value of 8 or less, the oscillator shuts off entirely. Since this translates to a frequency of over 12KHz, which is rarely used in synthesis, so I have omitted this detail for the time being, however this would be easy to implement if desired.

Let’s talk for a moment about the exact operation of the timer. It stores a value called the counter, that is initialized to the value of T. For each incoming clock, the counter is checked. If it is greater than zero, the value is decreased by one. If it is equal to zero, it is reset to T, and a clock is sent to the output.

Depending on the value of T, the Timer might send out several triggers per Reaktor sample. We are receing either 20 or 21 APU clocks per sample. With a mininum T value of 8, this means that there could be as many as three outputs from the Timer that we need to calculate at once.

With this in mind, I developed the following timer device:

Here, we are receiving three pieces of information: the current value of the timer (Cnt), the number of APU clocks left to process (Clk), and our previously calculated value of T.

If the counter is higher than the number of events, we simply pass the number of clock values to the ‘Events’ output, subtract it from the counter, and send zero clock events to the next Timer macro.

Otherwise, the ‘Events’ output get the number held by the counter, the counter is reset to T, and whatever clock events remain are sent to the next Timer macro.

Three of these macros connected together will give us the all of the information we need to continue:

Okay, so the values Clk and Cnt are being passed from macro to macro, as they are changing each time. The output ‘Events’ is the number of events to calculate at a given position.

This whole setup can be pretty confusing. The numbers coming out the ‘Zero’ output are events that occured before anything changed with the oscillator, IE before it received any events from the timer. The outputs ‘One’ and ‘Two’ require that the oscillator be clocked.

CONCLUSION

Next week, I’ll show how these Timers can be used to control NES oscillators. If you have any questions, suggestions, or comments, please leave them below!

The post Building an NES Emulator in Reaktor, Part II appeared first on NI Reaktor Tutorials.

How to Create a Waveshaper in Reaktor

Free Reaktor Ensembles – Gems from Around the Web

$
0
0

This week, I’m taking a break from writing tutorials about Reaktor to highlight the work of some Reaktor builders around the web, and to link you to some great free Reaktor ensembles. One of the goals of this website is to make building in Reaktor easier, another is to make it more rewarding for those who do put in the time and effort, in the hopes of fostering a more active and vibrant community.

With that in mind, if you like any of the work featured in this article, please leave a comment or consider donating to the creator – it really does make the building process much more fulfilling to receive feedback on your work!

RADIAN SOUND LABS

These are several years old, but they still pack a punch. I am surprised that they have not gotten more recognition, as they feature some pretty great presets and a very intuitive and well designed panel interface. They are six synth ensembles, currently available for free at the bottom of this page, using a ‘Pay with a tweet’ system for those of you with Twitter accounts.

MEGA-BASS 2020

From Icebreaker Audio, this ensemble is donationware. Built for live performance, with built-in integration with the Novation Launchpad. Available for download here, you can check out the videos and sound sample for more information. There are other free and paid Reaktor ensembles available on the site as well.

BRONTO SCORPIO DRONEBOX

This is one of those crazy noisemaking ensembles. I have no idea whatsoever what most of the knobs do. In that sense, it’s reminiscent of some of the more experimental Reaktor ensembles, such as Skrewell in the Factory Library. Check out a video sample here, and available for download here.

DRON-E

Antonio Blanca’s masterpiece ensemble, DRON-E, is newly available at Twisted Tools, as Antonio joins the Twisted team. This ensemble  creates fantastic morphing soundscapes, and can be found for free here. Both Antonio and the existing team at Twisted Tools have an immense amount of talent, so I’m excited to see what they’ll cook up together. In the meantime, enjoy this free offering.

BOSCOMAC

Then there are the fabulous Boscomac ensembles, made by an enigmatic builder in France. Featuring wonderfully designed GUIs, and a prolific release schedule, this work is impressive to say the least. We have an interview planned with this builder, as soon as I get it together to make it happen, so I hope to give you more details on these soon. For now, they can be downloaded here.

HYROGLYPHICUS

I wanted to make this post mostly about ensembles that can be found outside the Reaktor User Library, but I also want to spread the word about this new synth, which designer Michael O’Hagan has been working on for a very long time. Packed full of features and modules, this is an impressive build indeed.

REAKTOR TIPS FRAME 3

Created Peter Dines, a talented builder who mainly focuses on Sample-based ensembles. ReaktorTips.com has some great tutorials available, especially in the realm of event processing. Better yet, there is a tutorial on this very ensemble, so you can check out how it works if you’re interested.  Download here, and be sure to check out the rest of the site too!

MODULATOR

My own work. You can download most of my free Reaktor work here. I hope you enjoy it!

If you feel like I’ve missed anything, please let me know in the comments and I’ll try to include in the next roundup!

The post Free Reaktor Ensembles – Gems from Around the Web appeared first on NI Reaktor Tutorials.


Wavetable Oscillators in Reaktor

More Free Reaktor Ensembles

$
0
0

This week, I’ve got another collection of great free Reaktor ensembles from around the web (you can find our first compilation here).

Due to some shortcomings, (not to mention widespread discontent with the ratings system) use of the official Reaktor User Library has dwindled in recent years. This has a couple of effects – one is that the community becomes more fractured as people  leave the User Library and post their work on their own sites, another is that the great stuff that does get uploaded often gets missed by many people.

Since one of the greatest benefits of giving away your stuff for free is seeing people use and enjoy your work, I hope to bring some more attention to various projects. If you find something you like, let it’s designer know!

One last word before we get started – I spend so much time in Reaktor programming and making tutorials that I don’t get as much time as I would like familiarizing myself with the work of others. If you have any suggestions for me to check out, leave them in the comments.

Babble On (and more) by JJ Clark

I wish I’d known of this guy when I was going to McGill, maybe I wouldn’t have dropped out! There is a lot of stuff on this page, all of it somewhat older, but still great. For me, standouts include the Babble On ensemble, a speech synthesizer that is quite impressive and complex, and  wXform, an additive synthesizer.

Download here.

I haven’t had the time to try everything on this site, but the stuff I have used is very good.

Babble On is capable of programming out very long sequences (one of the presets is “She Loves You” by The Beatles) and comes with a manual to help with programming. Simply choose a preset from the Song Selector instrument and press the play button in Reaktor to check it out.

JJ Clark is also the editor of an online book, Advanced Programming Techniques for Modular Synthesizers, that focuses primarily on the Nord Modular, but has applications in Reaktor as well.

VOSIM by Golden Master

Speaking of the Nord Modulars, and vocal synthesis, here’s a Reaktor ensemble based on a Nord G2 patch that was originally inspired by the VOSIM technique. The result is a pretty nifty synth capable of making some very strange sounds that are reminiscent of speech but also very digital sounding.

Download here.

Graincube

Made by a dream team of Reaktor veterans, including Richard Devine (whose work is included in the Reaktor 5 library) , SonicTwist and Antonio Blanca of Twisted tools, and Rick Scott AKA rachmiel, a prolific experimental Reaktor designer, Graincube is amazing! You can download it from Devine’s website, http://devinesound.net/. Due to the design of the site, I can’t provide a direct link, but simply click on the ‘Library’ section, and Graincube is listed quite close to the top.

Analogeeks by Sign Industries

Sign Industries is a french record label that put out this Reaktor ensemble for free a few years back, complete with a soundbank designed by artists form the label and templates for the Lemur/iPad. A very cool idea with a fairly good implementation, nice design all around. Download here.

Echo Grease by Colin Brown

Colin Brown is one of the more talented builders out there willing to share for free. His newest ensemble, Echo Grease, is certainly worth grabbing from the User Library (you must have a registered copy of Reaktor to access this). Built on top of an old ensemble of his from the Top 100, this is a fantastic new effect with a lot of depth to it.

Before I post a link, I just want to mention some things about the voting system in the User Library. Basically, due a poorly programmed rating system, any vote less than a 10 is actually very bad – so you might think you’re doing somebody a favor by voting 9 out of 10, but actually these votes just destine an ensemble to a low rating and to never be noticed. So, if you enjoy an ensemble from the UL, please give it a 10, folks really do appreciate seeing their stuff do well.

Download Echo Grease.

Colin is also the force behind some other amazing projects. A few years back we were both working on convolution engines, something that had long been claimed as impossible in Reaktor. While I was able to get something mostly working, Colin ironed out all of the bugs and posted it to the UL. It may be a little complex to use, but it really is a great feat of engineering that it works at all, and it deserves more respect than it’s gotten so far!

Download ColB’s Convolution Engine.

TG-8H by Lazyfish

Here is the original prototype for the Factory Library ensemble Skrewell, by Lazyfish. Crazy sounds, ever morphing and capable of some really weird stuff. Currently this ensemble and a mod by Rick Scott occupy the top two slots of the Hot 50. Really great stuff!

Download Here.

Submit!

Like I mentioned, I rarely have time to check out much in the User Library or elsewhere, being very busy with my own projects in Reaktor. I would like, however, to regularly update this site with quality Reaktor ensembles from around the web. One thing in particular I’d like to publicize is ensembles in the UL that deserve more attention and a better rating, so if you have any in mind, please post them in the comments!

The post More Free Reaktor Ensembles appeared first on NI Reaktor Tutorials.

Morphing Wavetables in Reaktor

Telephone Filter in Reaktor

$
0
0

In this tutorial, I’ll show how to make a simple macro to simulate a vintage telephone filter in Reaktor. This can be done completely in Primary, using some simple math and basic signal processing. This tutorial is based on a section in the book Digital Audio Effects, edited by Udo Zölzer. A download will be provided at the end for those who are interested.

This is an intermediate tutorial, assuming basic knowledge of filters and waveshapers. Appropriate links will be provided to get you up to speed along the way.

OVERVIEW

The basic structure of the vintage telephone simulation contains four elements: A pre-filter, distortion, added noise, and a post filter. Taken individually, each of these elements can be constructed with relative ease. Modern telephones, due to better quality components, can be modeled simply with the post filter, which is a bandpass. As such, they do not exactly make an exciting project on their own.

PRE-FILTER

The pre-filter has the structure of a comb filter. The transfer function is given by:

y = 0.9x(n) – 0.75x(n-11)

Where y is the output, x(n) is the input, and x(n-11) is the input delayed by 11 samples. This can be made pretty easily with a Single Delay module and some math:

DISTORTION

The distortion macro adds some grit and character to the sound. As it is based on a non-linear function, it might be a good idea to use oversampling, however, since we are processing voice signals, and the equation only adds second order harmonics, it is unlikely to cause much aliasing.

The equation for the distortion is given as:

y(n) = (1 − α)x(n) + αx2(n)

where x(n) is the input, y(n) is the output, and “α” is the amount of distortion. Again, this is easy to implement using simple arithmetic:

POST-FILTER

We’re going to skip right over the noise factor here, since all that is required in that section is a Noise Oscillator module with a very low amplitude being added to the signal directly after the distortion macro. The last element is also very simple – a bandpass filter allowing though frequencies between 400 Hz and 3400 Hz.

To make this, I’ll simply use a low pass and a high pass connected in serial:

The band pass ends up filtering our white noise (evenly distributed across the frequency spectrum) and making it colored noise instead.

CONCLUSION

This cool little project yields some pretty nifty results. You can download a basic ensemble using it here.

If you have any comments, questions, or suggestions, please post them below.


The post Telephone Filter in Reaktor appeared first on NI Reaktor Tutorials.

Create a Simple Drum Machine in Reaktor

Viewing all 150 articles
Browse latest View live